Here are the 6 ways to bypass the primer bulb on the weedeater:
- Remove the screws
- Pull away the sir bulb and metal plate
- Clean the air bulb seat
- Put the polyethylene in place
- Screw the metal plate back on
- Press the polythene ball a few times
Go through the whole article to learn how to bypass primer bulb on weedeater.
Key takeaways
- A primer bulb is a bulb that will start the engine by thrusting gasoline fuel into the engine.
- Different types of weedeater primer bulbs are rubber-made and plastic-made.
- There are 6 ways to bypass the primer bulbs on the weedeater.
What Is a Weed Eater Primer Bulb?
A primer bulb(also known as an air bulb) is a bulb that starts the engine by thrusting gasoline fuel into the engine. The purpose of gasoline is to form a spray mist while being mixed with the necessary amount of air.
Now, why do you need to bypass a primer bulb on the weedeater?
Well, most of the time, the air bulbs that are made of weak materials like rubber or plastic often break down, crack, or deteriorate. So, it needs to be bypassed by the owner.
Different Types Of Weedeater Primer Bulb
There are a couple of material types of weedeater primer bulbs. Have a look at each of them and the basic whereabouts-
- Rubber Made: Usually transparent or colorful design.
- Plastic Made: Tough-built and can be used for primer bulbs of chainsaws, trimmers, etc.
All that said, no matter if it’s made of rubber or plastic, over regular use, these bulbs will be damaged. And you need to change or repair these instead of bypassing them. Also, learn what to do when tomato plants have too many flowers.
6 Ways To Bypass The Primer On The Weedeater
Here are the ways to bypass the primer on the weedeater:
Step1: Remove The Screws
- Remove the two screws on either side of the air bulb using a screwdriver.
- But if you also come across flat-head screws or Philip screws. The manufacturer of your weedeater mostly determines it.
- Put them aside when you have finished removing the screw.
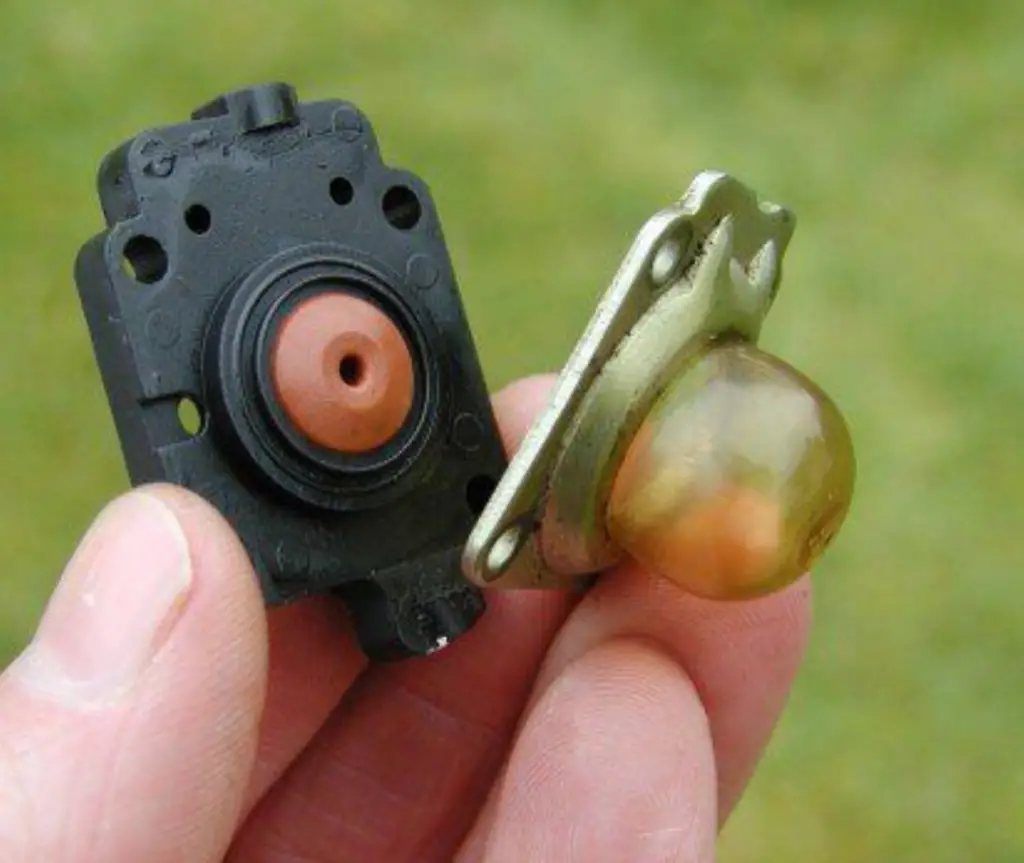
Step 2: Pull Away The Stir Bulb And Metal Plate
- Now pull the metal plate up to remove it from around the air bulb.
- Then remove the previous faulty air bulb by pulling it straight up.
- If anything is stuck, use needle nose pliers to remove stuck objects.
Step 3: Clean The Air Bulb Seat
- Clean the sir bulb area thoroughly and carefully as a lot of dirt can build up around it on the weedeater.
- There is a chance that it might cause harm to the weedeater’s inner mechanism if it enters the carburettor.
Step 4: Put The Polyethylene In Place
- Now, place the polythene under the metal plate where the air bulb was and push outward from the hole using your finger.
- Doing this will form a ball of polythene and function similarly to the primer bulb.
Step 5: Screw The Metal Plate Back On
- Then reattach the metal plate by carefully tightening it using the two screws.
- Ensure there is no outside air getting into that tiny ball of polythene by making it too tight.
Step 6: Press The Polythene Ball A Few Times
- Now you can get your DIY bulb prepared so that you may begin operating your weedeater right away.
- Gas will accumulate in the polythene ball after properly tightening the screw fittings.
- Now keep pressing that little ball against the carburetor line for a while. This will form bubbles.
- This is the indication that the weedeater is ready to operate. So now you can start your weedeater now.
- Even though it might take some effort at first, it will eventually fire up after some attempts.
In most cases, it has to be pressed a set number of times. It then starts the engine and allows a certain amount of fuel to enter the carburettor.
You can also fix the primer bulb not filling by yourself. Although, we would still recommend you to replace it.
Bonus: Learn the reasons why the aloe plant is turning into different colors.
Frequently Asked Questions
Do Primer Bulbs Need To Be Filled With Gas?
Answer: A primer bulb sits in between a fuel line and a carburetor. So, yes it needs to be filled with gas because otherwise, gasoline wouldn’t enter the carburetor.
Why Is My Primer Bulb Not Working?
Answer: When a primer bulb isn’t working, in most cases, the bulb is at fault. With usage, they might get cracked or deteriorate and let air in
Do You Need A Primer Bulb On A Weedeater?
Answer: In easy words, yes you need to have a primer bulb on a Weedeater. The carburetor needs a proper gasoline flow and a primer bulb ensures that.
Conclusion
That was all we could provide and explained how to bypass primer bulb on weedeater. Hopefully, these methods have helped you gain insight and you’ve come to a decision.
So, what have you decided to do regarding the primer bulb on the weedeater? Share your thoughts in the comment section below!

- Are Phlox Deer Resistant? (Answer Revealed) - December 16, 2023
- 6 Ways to Bypass Primer Bulb on Weedeater (What to Do) - November 2, 2023
- Why Won’t My Peppers Turn Red [All Reasons & Solutions] - October 24, 2023