Nobody likes when their lawnmowers suddenly stop on a holiday in the middle of work. Usually, it’s because of minor problems which are easy to fix. But replacing a PTO clutch requires some heavy work to do.
So, how to replace pto clutch on a exmark lazer?
First, you’ve to remove the old clutch from the shaft. Then, take some sandpaper and clean the shaft until it’s polished. When that’s done, install the new clutch by putting it back on. After that, clean the bolt and apply the thread-locking fluid. Lastly, use a torque wrench to adjust the torque.
Anyways, that was the summary on the PTO clutch replacement. We’ve discussed and provided a full X steps walkthrough in easy words.
How to Replace a PTO Clutch?
PTO clutch replacement might seem complex but actually, it’s super simple. And the best news? This whole replacement process takes only 20 minutes to do it.
But before we begin, we’ll need to gather up some tools. Most of them are household tools and easy to get.
Gather the Necessary Tools
To save you some time, we’ve provided a full list of every possible tool. So, let’s take a look at them below:
- New PTO clutch
- Torque Wrench
- Impact Wrench
- Any Thread-locking Fluid
- 320-400 Grit Sandpaper
- Cleaning cloth
- Liquid Soap
- WD-40 Oil
Manage these tools as soon as possible and we can get started right away!
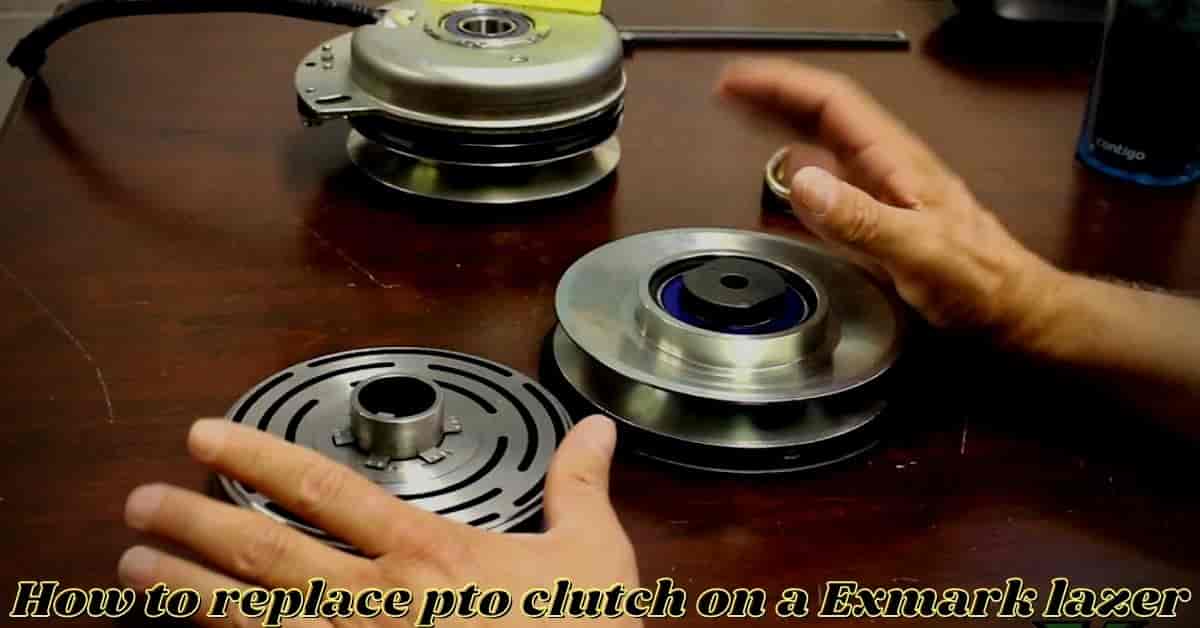
Step 1: Remove the Old Clutch
We’re going to start the removal process by detaching the belt from the clutch. When you’re done with the belt, remove the power clip. It’s usually at the back of the clutch.
Now, gently take off the bolt. The bolt may be dirty or sticky but leave that for now. But be sure to keep the bolt close to you because we’ll need it again soon.
Anyways, we’re now ready to pull out the clutch from the shaft. Grab the clutch firmly and pull it towards you. It should come off very easily.
Usually, a clutch weighs about 10-15 pounds so be careful when removing it.
Step 2: Clean the PTO Shaft
Now that you’ve removed the old clutch, you can see the crankshaft. It can be oily and dirty depending on the usage.
To clean the shaft you can use 320-400 grit sandpaper. Although a 220 grit should be fine, sandpapers over 320 grit polish a metal nicely. So, we’ll recommend 400 grit sandpaper for this job.
Start the process by spraying some WD-40 oil or dishwashing soap. Then, clean the shaft with the sandpaper you’ve managed.
This will take 2-3 minutes at most. Keep cleaning until the shaft is fully polished. Lastly, spray some WD-40 oil on the shaft and you’re done!
Step 3: Put in the New Clutch
To align the new clutch properly, look for the bracket on the mower. This bracket prevents the clutch from spinning.
So, when the clutch is aligned, gently push it in. At the end of the previous step, we’ve oiled the shaft after cleaning it.
So, the clutch should slide right in effortlessly.
Step 4: Apply the Thread-locking Fluid
Remember the bolt we’ve told you to keep closely? Well, we’re now going to need it.
But before that, there’s some cleaning to do. Like before, get some liquid oil or soap and 220-320 grit sandpaper.
Apply the oil on the bolt and start rubbing the sandpaper on it. Keep doing it until the bolt is fully cleaned.
Now, we’re going to apply the thread-locking fluid. A thread-locking fluid works on fasteners like bolts to prevent leakage or corrosion.
If you’re done with the cleaning, hold the bolt firmly and put it in. The bolt will get in smoothly.
Also, here’s a list of our favorite thread-locking fluid –
Now you can get whatever you like and get that bolt cleaned!
Step 5: Tighten the Bolt with a Torque Wrench
A clutch needs a specific amount of torque. For an Exmark Lazer, you’ll need to apply 55-60 ft-lb torque.
If you haven’t operated a torque wrench before, it might seem too complex to you. But don’t worry! Here’s a guide that will help you understand how to use a torque wrench.
Set the torque to 55-60 ft-lb and you’re good to go. Hold the outer part with an impact wrench and start turning. Turn the wrench clockwise until you hear a tick.
When you’ve heard multiple clicks/ticks, take the torque wrench out. The bolt is installed perfectly.
Step 6: Put the Belt Back on the Clutch and Plug-In the Wires
We’re almost at the end of the replacement process and only one step away. We’re now going to put the belt on which will require a bit of strength.
But there’s a trick to easily put on the belt which often is a hassle to many people. First, put the belt on the clutch and try to insert as much as you can.
Now, start rotating the clutch counterclockwise and walk the belt on. The belt will go back in smoothly.
When you’re done, connect the wires and your replacement is complete.
If you’ve come this far by yourself, don’t forget to credit yourself. Because you’ve done a great job! However, if all these still seem bothersome, you can always hire a mechanic.
Frequently Asked Questions
Question: How do I know if my PTO clutch is bad?
Answer: To check a PTO clutch, you’ve to look for the clutch engagement noise. Turn on the key. If you’re not hearing any noises, the clutch may have suffered from excessive heat.
Question: How long does a PTO clutch last?
Answer: Usually, a PTO clutch can last up to 4-5 years. If we’re talking about working hours then it’s around 600-1200 hours depending on the model.
Question: How does PTO clutch work?
Answer: PTO in PTO clutches stands for Power Take-Off. It provides a connection to the equipment that can’t generate its own power. In short, a PTO clutch transmits the energy to other equipment.
Conclusion
That’s all we could provide on how to replace PTO clutch on a exmark lazer. We hope this replacement process has helped you; even if a little bit.
So, were you able to replace the clutch? Share your story with us using the comment box below.
Finally, good luck!

- Are Phlox Deer Resistant? (Answer Revealed) - December 16, 2023
- 6 Ways to Bypass Primer Bulb on Weedeater (What to Do) - November 2, 2023
- Why Won’t My Peppers Turn Red [All Reasons & Solutions] - October 24, 2023